26 February 2018

The Best is Yet to Come | Couture Creations


Hiya Everyone.
I taking a journey back today using Bohemian Bouquet from Ultimate Crafts. I wanted to make a striking yellow and white card and Bohemian Bouquet has some pretty patterned papers in the colours I wanted. 
Couture Creations has just released a new range of Hotfoil Stamps called Everyday Sentiments and I am showing one today.


Here is a look at the bits and pieces I have put together to create my card.

So to start I cut myself a 6x12" piece of the white Ultimate Craft cardstock and scored it at 6" to create my 6x6" card base.  Next I cut one of my patterned papers to 5 3/4" square and distressed the edges before inking the edges with a matching yellow ink.  I then selected a second patterned paper and cut it to 5 3/4" x 3" again distressing the edges and inking in yellow ink.

I die cut one of the Bohemian Bouquet Laced Petals dies in the Snow White cardstock.  Again I inked the edged and then snipped it in half. Using the Vintage Matte Gold ink I hotfoiled the sentiment on an offcut of the Snow White cardstock, snipped in one long edge with scissors and then once again distressed the edges and inked them with the yellow ink.


Next I adhered them to the card base. And all that was left to do was embellish with my chosen flowers in a cluster, add the die cut and add the sentiment.  My last finishing touch was adding some of the small gold pearls to the card.


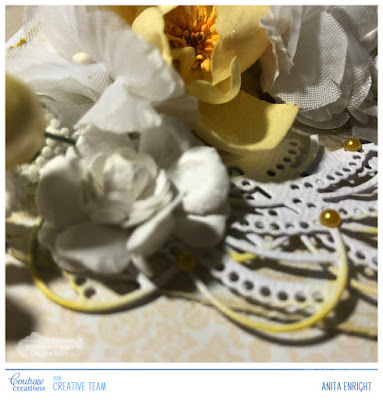
Here are a few closeups of the card.


PRODUCTS USED

Bohemian Bouquet

Be Merry

Other
Thanks for stopping by.  Come back and join us again tomorrow.

Ciao for now,
Anita
xx


17 February 2018

Wishing you a Bunch of Flowers | Couture Creations


Welcome to Friday everyone, I hope you have had a great week even if you were working like me.

I am continuing with the gorgeous C'est La Vie collection.
My card today was creating using off cuts from my 12x12" paper pad.  It shows
how you can ensure you make the most out of your paper pads.


For this card I made a 6x6" white card base.  You can resize it to any size depending on the off cut paper pieces that you have .

After making the card base, I selected a range of papers and cut them to 2x2" in size.


Next I destessed all the edged and placed them on the card base just to get an idea of how I wanted the card to look.


I then adhered them all down, making that when I attached the double sided tape that I didn't go right to the edge so that once all pieces were attached, using my fingers I could distress the edges more. 
The next picture shows the extra distressing along with two pieces of decoupage flower attached with 3D foam mounting tape.

To finish off I just went to town with my flowers to make it very pretty.
Sorry for the hot glue gun threads.... I thought I got them all.


PRODUCTS USED

C'est la Vie Collection


Thanks for stopping by... hope to see you again soon.
Keep crafting :)

Anita E


7 February 2018

Stop and Smell the Roses | Couture Creations


#artdecocreations   #couturecreationsaus    #ultimatecrafts  

Good Morning Everyone,

Having pretty papers to play with makes creating so much easier.  I love the C'est La Vie collection and am really enjoying doing layouts with the 12x12 paper pad. This latest one is of me with my gorgeous niece Sabine and some Snapchat fun :)


I decided for this layout that I needed to mute the patterned paper that I used to base my layout around.  To do this I chose to use the Anna Griffin/Couture Creations Acrylic Gesso.  I did a light coat to the paper and allowed it to dry.


This 2nd photo shows how much softer the paper looks.

I added some texture to the background using one of the Anna Griffin/Couture Creations stencils with the beautiful fluffy embossing paste.  This embossing paste is my go to for adding texture to my pages.  It is a beautiful white and more importantly it dries so quickly which is fantastic as it doesn't slow me down to much when I am on a roll with my creating.

 Next I took a selection of patterned papers and transformed them in to banners of differing widths and lengths.  I muted the edges with a matching pink ink.

Below is a rough placement of how I wanted the papers to look before I adhered them to the page.

I added a paper doily to the sides of banners to bring in some white to the page.  
This really popped in the finished page. I also added a largish paper doily from my collection.

Once this was done I mounted my photo on to a soft green/blue Ultimate Crafts cardstock called Charming, again softening the edges with the pink ink and then just added a die cut (discontined) in the same green behind the photo (cut in half), overlapping the paper doily.

Once my photo was attached to the page, I added some bling and my flower cluster.  The two butterflies at the top were fussy cut from one of the pieces of paper.

To finish it off I chose a chipboard title from the C'est La Vie collection, Stop and Smell the Roses.  This one was hotfoiled using the Champagne coloured foil.

I hope you like it.